Simplifying Access Control with Privileged Identity Management (PIM)
July 20, 2025
|
Hassan Anees
Privileged Identity Management (PIM) is a cool feature. I’ve been toying around with it in Entra ID for a little while. In short, it’s a technology that allows administrators to elevate just-in-time to privileged roles. It leaves an audit trail and limits the duration for the privileged role.
For the purpose of this demo, we’ll create a security group called “Dummy Group - Global Administrators” where members of this groups can elevate to the Global Administrator role. This ensures that admins are not perpetually in a highly privileged role and leaves an audit trail for when it’s utilized.
Here’s the overall gist to get things going:
-
Create an Entra role assignable security group
-
Assign role(s) to the security group
-
Add Members to this group
-
Activate the role in the PIM management blade
-
Rinse and repeat
Prerequisites
You will need the Privileged Role Administrator role assigned to your account in order to create role assignable security groups. In a nutshell, security groups in Entra ID can have a Entra ID role attached to them now meaning that anyone placed in that group will inherit the assigned role.
As for licensing, any of the following will suffice:
-
Entra ID P2
-
Entra ID Governance
-
Microsoft E5
Getting Started
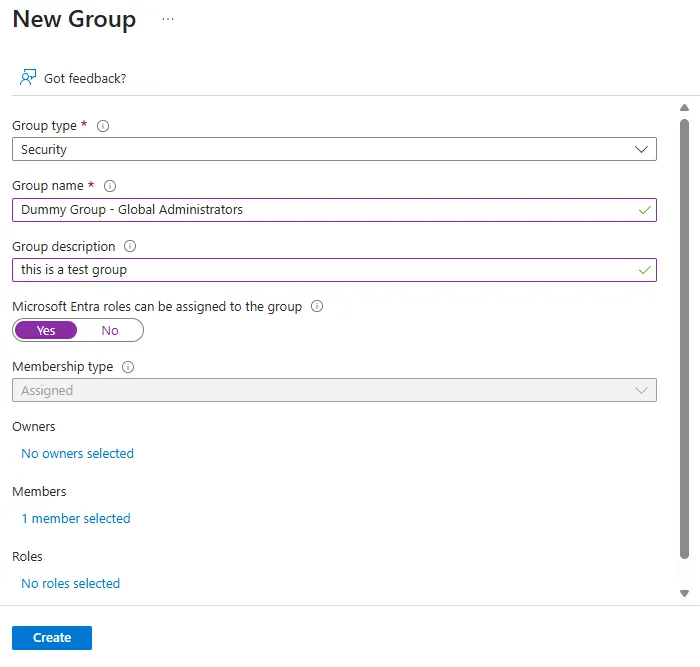
Let’s create the an Entra role assignable group called “Dummy Group - Global Administrators”.
Note: You have a limit of 500 role assignable groups within your tenant.
-
Start by heading over to entra.microsoft.com > Groups
-
Select New Groups
-
Select Group Type as Security
-
Enter groups details such as name and description
-
Set Microsoft Entra roles can be assigned to the group to Yes
-
Select Members and add your admin(s)
-
Hit Create
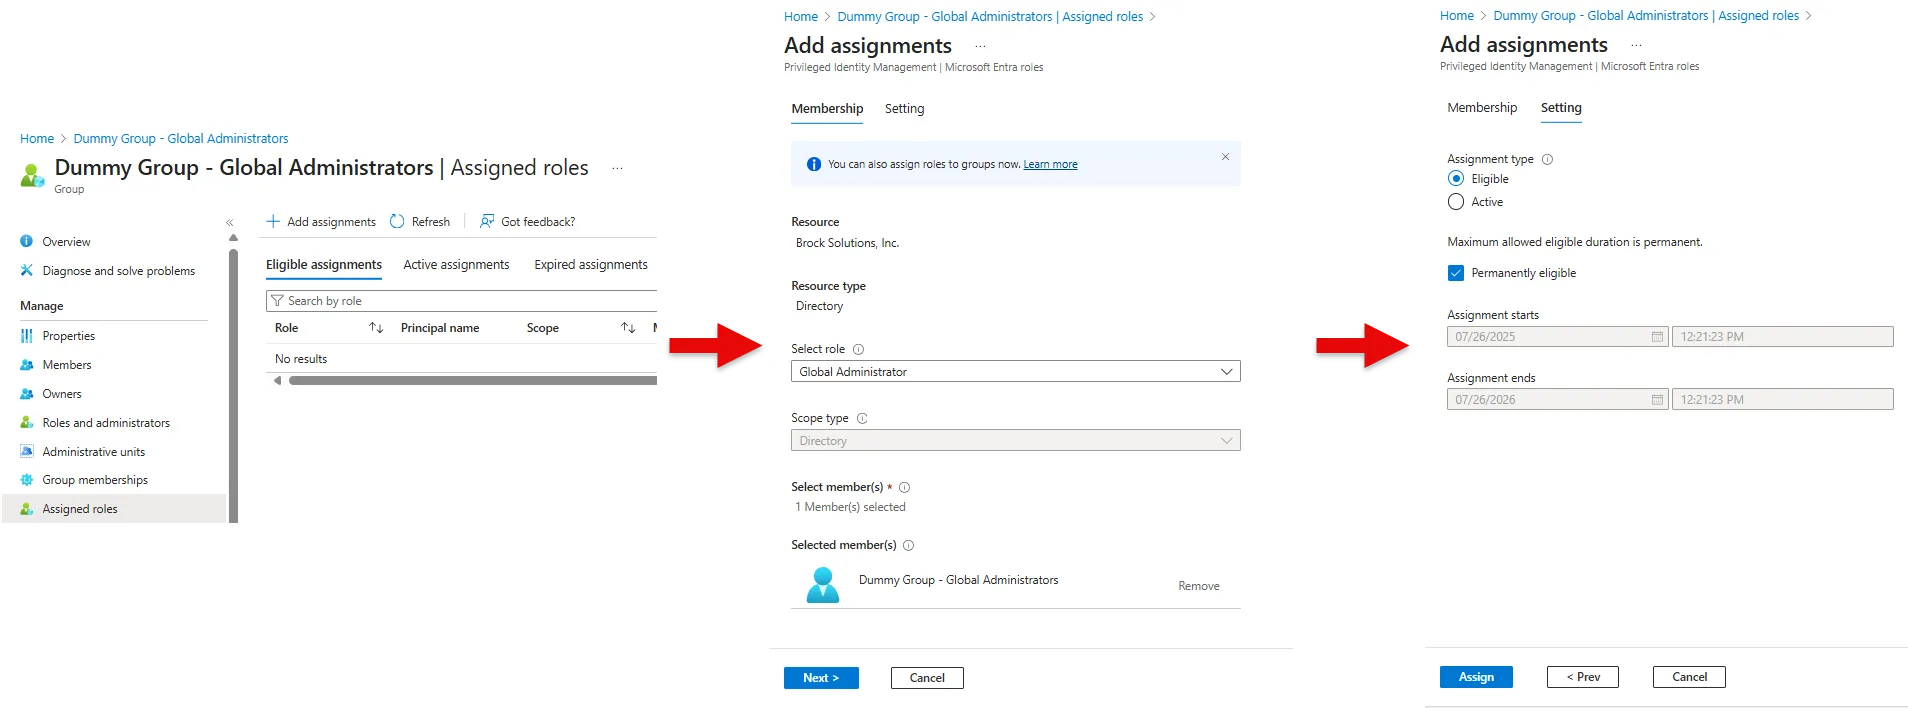
Now that we have created the group and added members, we can assign it the Global Administrator role.
Note: If you added the role in the previous step then the added users will already have the as active by default instead of needing to elevate. We require users to be eligible for the role.
-
Select the newly created group
-
Select Assigned roles
-
Select Eligible assignments and hit Add assignments
-
Click the drop down Select role to search and select the Global Administrator role and hit Next
-
Select Eligible and choose the time frame for how long you want the chosen role as eligible. For this demo we will make it permanently eligible
-
Click Assign
Activating roles with PIM
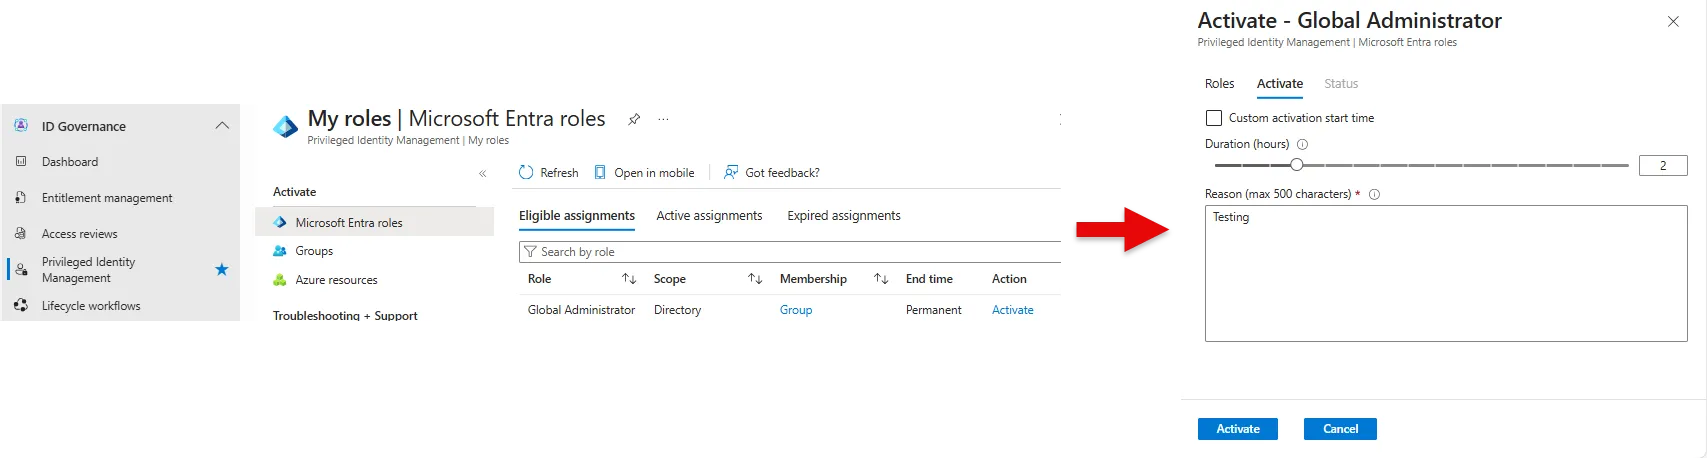
We’re done with the configuration, let’s use it! We can now activate the role going into PIM menu under the Identity Governance section of Entra ID.
-
Start by heading over to entra.microsoft.com > Identity Governance
-
Select Privileged Identity Management and click Microsoft Entra roles
-
Under Tasks select My roles where you will see any additional roles you are eligible for
-
Select Activate
-
Set your required duration and justification and hit Activate
The current configuration will auto elevate you into the role. There is an option to require approval for added visibility and control. You can do this by:
-
Heading over to Privileged Identity Management menu > Manage (Microsoft Entra roles) > Manage (Roles)
-
Select the role Global Administrator
-
Click Role settings > Edit
-
Hit Require approval to activate to add users who approve/deny requests
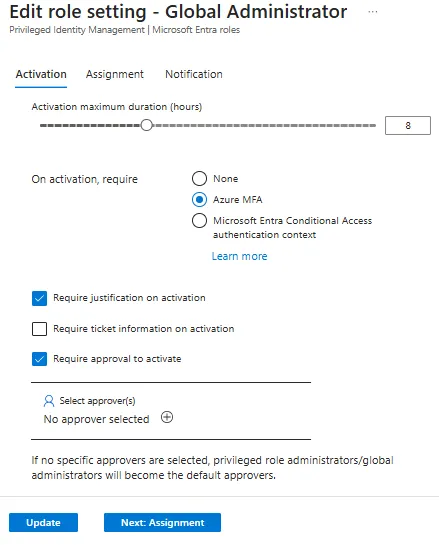
Under these role settings you have the option to adjust how long a role can be activated for, requiring MFA, and adding it to a Conditional Access authentication context.
There’s tons more you can do with PIM that was not covered here. Maybe in another post I’ll touch on PIM for groups and Azure resources. If you have any questions, I’d love to hear from you. Hope this helped.